Navigate to the Create Customer page | Step by Step ScreenShot
By Jag - October 15, 2014
This procedure lets you create:
A new customer
An account for the customer
An account site for the account
A business purpose for the account site
Prerequisites
This table describes some terms in the pages used for this procedure.
Selected Terminology:-
Profile Class:
A category previously defined in the Customer Profile window. You can classify your customers by industry, location, size, creditworthiness, business volume, and payment cycles. If you choose industry, you might want to define classes such as High-Tech, Real Estate, Wholesale, and Retail
Account Type:
The type of account you are entering. Use Internal to track customer accounts within your company and External to track customer accounts outside your company.
Account Description:
Lets you store the descriptions of a customer account, such as account name. Account descriptions cannot be loaded using the Customer Interface tables. Although you can manually store account description data or populate the data using the TCA APIs, that data is displayed only on the Customer set of pages.
To create a customer:
1. Navigate to the Create Customer page.
The Create Customer page displays differently, depending upon your customer type selection, Organization or Person, on the Customer Search page.
2. Enter customer, account, and account site details.
Attention: To create a customer, you must specify at least a customer name, account number, and account site address. All other details are optional depending on the business requirements at your enterprise.
Note: You can either enter a customer account number or enable Automatic Customer Numbering.
Even if you do not enable Automatic Customer Numbering, customer account numbers are automatically generated if the MO: Default Operating Unit profile option does not have a value.
3. Click Save and Add Details or Apply.
Practical Steps:
1. Navigate to the Create Customer page.
N: - Customers-> Customers
 | |||||||
| Create Customer page |
 | |||||||||||||||||||||
| Customer Type
2. Click on Create button

3. Enter the Organization name
as Ivas Industries Pvt.Ltd

4. Enter the Address details

5. Enter the Operating unit as Ivas operating unit
6. Enter the ‘Bill to’ as the Business Purposes and enable it as Primary then Click on Add Another Row 
7.
Enter the ‘Ship to’ as the Business Purposes and enable it as Primary
8. Enter the Customer
information and click on Apply button
 9. Select the Search By as Location then click on radio button then click on Select button 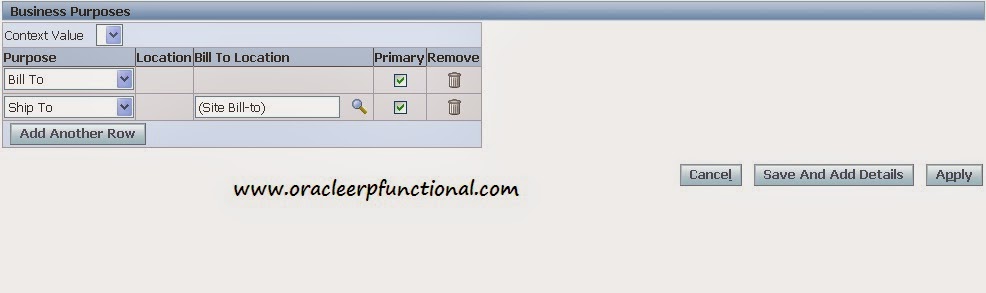
10. Click on Save and Add
Details

11. Enter the Account
description as Ivas_Account

12.
Click on Apply
13. Click on Payment Details tab

14. Click on Add Receipt Method

15. Enter the Receipt Method as
Ivas_AutomaticReceipt and enable Primary Payment if required

16. Click on Apply and
Close
|
0 comments